
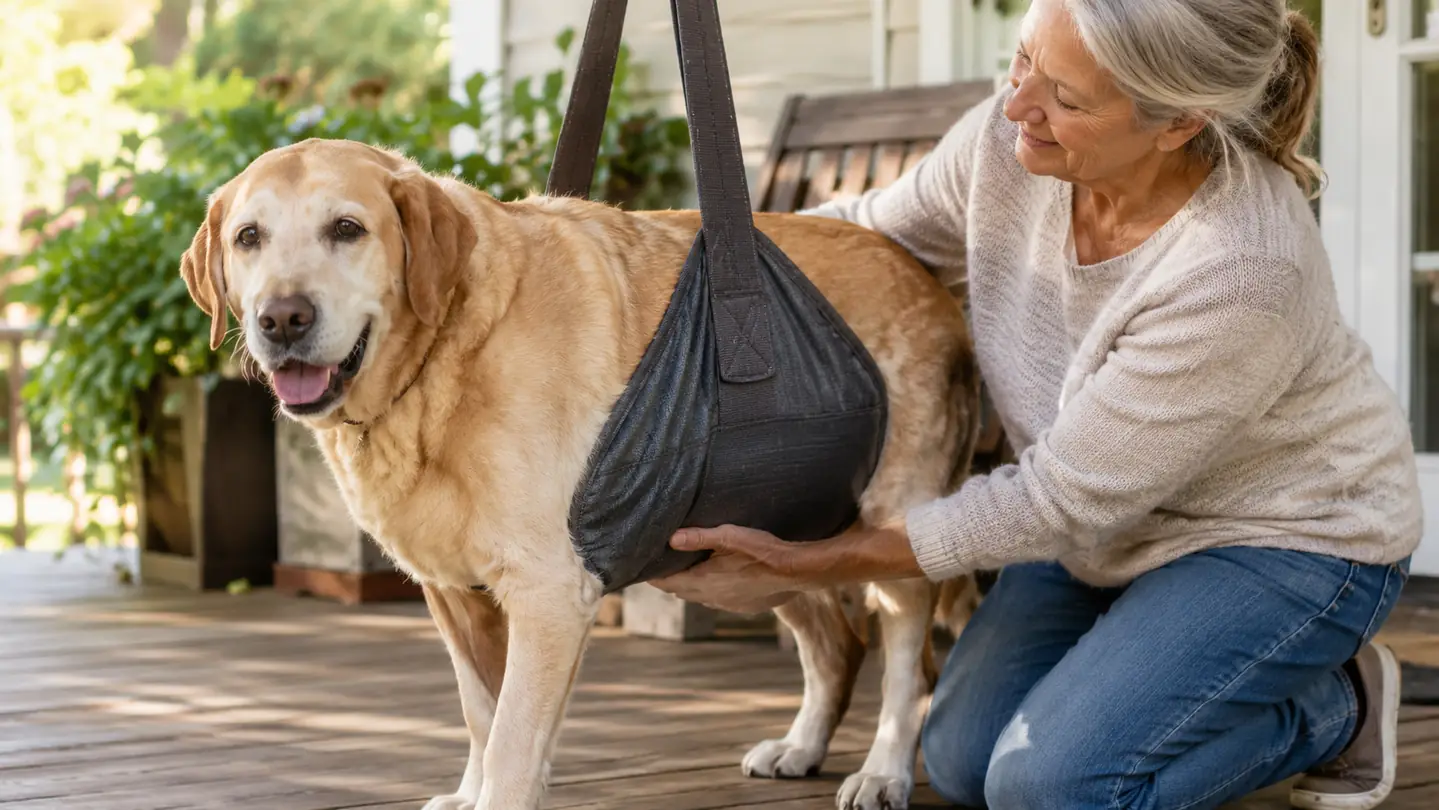
Maple is an 11-year-old yellow Lab, about 70 pounds, and she has always acted like a puppy until she gets up from a nap. The first time I noticed her back legs wobble, I told myself she just slept funny. Then she started hesitating at the back porch steps, and I started doing what I did for thirty years as a PE teacher: I stopped guessing and made a plan.
The plan that helped most was not a medicine, a supplement, or a fancy ramp. It was a simple rear support sling from LOOBANI, used the right way, at the right moments, every single day. This is the exact five-step routine I use with Maple, written for anyone whose older dog is starting to struggle with stairs, the car, or longer walks.
The sling that got Maple back to the porch steps
A wide, padded rear support sling with two handles, sized for large dogs. I keep it by the back door and use it every morning.
Amazon Check Today's Price on Amazon →Step 1: Get the sling positioned before you ask the dog to move
The biggest mistake I made at first was waiting until Maple was already struggling. I would see her hesitate at the steps, then try to slide the sling under her while she was tense and confused. That turned a simple tool into a wrestling match. The first time I tried it that way, she sat down hard on the bottom step and refused to move for a full five minutes, and I stood there holding a sling that was doing nobody any good.
Now I put the LOOBANI sling on her before we even approach the steps. I slide the wide padded panel under her belly, just ahead of her back legs, and bring both handles up over her back. The panel sits flat against her underside, and the handles rest where I can reach them without bending over awkwardly. I measured the panel against her the first week we had it, and it covers the space from just behind her ribs to just ahead of her back legs, which is exactly where she needs the support.
The key is to do this while she is standing still and relaxed. I talk to her in the same calm voice I use when I tie my shoes before a walk. She knows the routine now, and she stands still for it. If your dog is new to the sling, let them sniff it first, then practice just placing it under them without asking them to walk anywhere. I did that with Maple for two evenings before we ever tried the steps, and I think that is why she never fought the sling itself.
Step 2: Use both handles, and lift with your legs, not your back
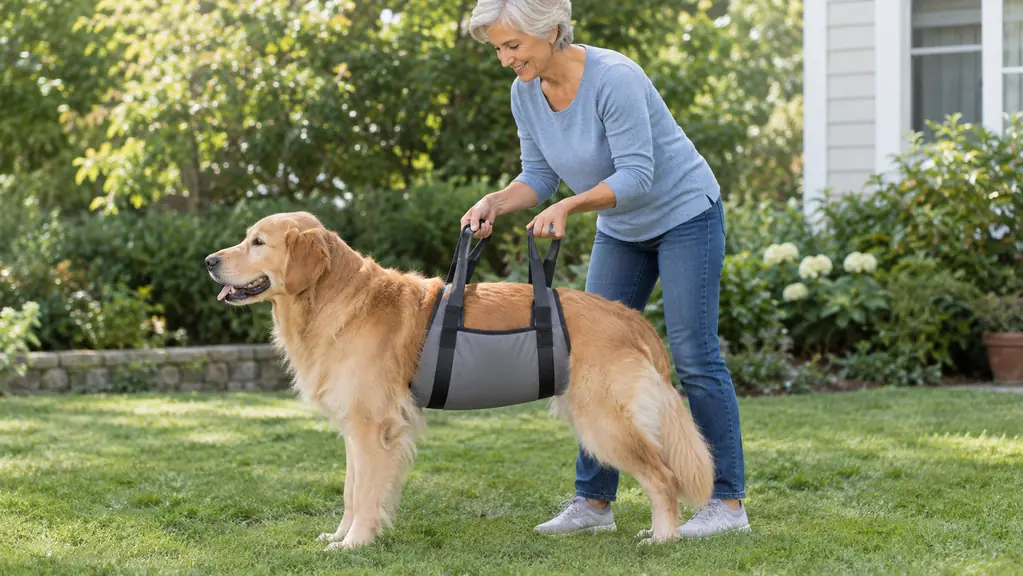
A rear support sling only works if you use it the way it was designed. I hold one handle in each hand, with my arms down at my sides, and I take just enough weight off her back end to let her move her legs without dragging them. I am not lifting her off the ground. I am taking maybe ten or fifteen pounds of pressure off her hips. I know it is about that much because I can feel the difference in the handles: when she is putting weight on her own legs, the handles go slack, and when she needs me, they pull tight.
This matters for two reasons. First, it protects her. When I lift too much, she loses her footing and panics. When I lift just enough, she can still feel the ground and place her feet herself, which keeps her muscles working. Second, it protects me. I am 61 years old, and I have no interest in throwing out my back trying to carry a 70-pound dog. I learned that lesson the hard way in my first week of teaching, when I tried to spot a student by lifting instead of guiding, and I have not made that mistake since.
The LOOBANI handles are padded and long enough that I can stand upright while I walk beside her. I do not hunch over. I keep my own back straight, bend my knees slightly, and let the sling do the work. If you find yourself bent over like a shrimp, you are holding the handles too low or trying to lift too much. I also adjust the strap length before I put it on her, so the handles land right at my hip height. That took me a few tries to get right, but now it takes me about ten seconds.
Step 3: Take the steps one at a time, with a pause at the top
Our back porch has three steps, and for a while those three steps were the hardest part of Maple's day. She would stand at the bottom, front feet on the first step, back feet planted, and just wait. She was not being stubborn. She was trying to figure out if she could do it. One morning this spring, she stood there for almost two minutes before she tried, and I could see her back legs trembling the whole time. That was the morning I ordered the sling.
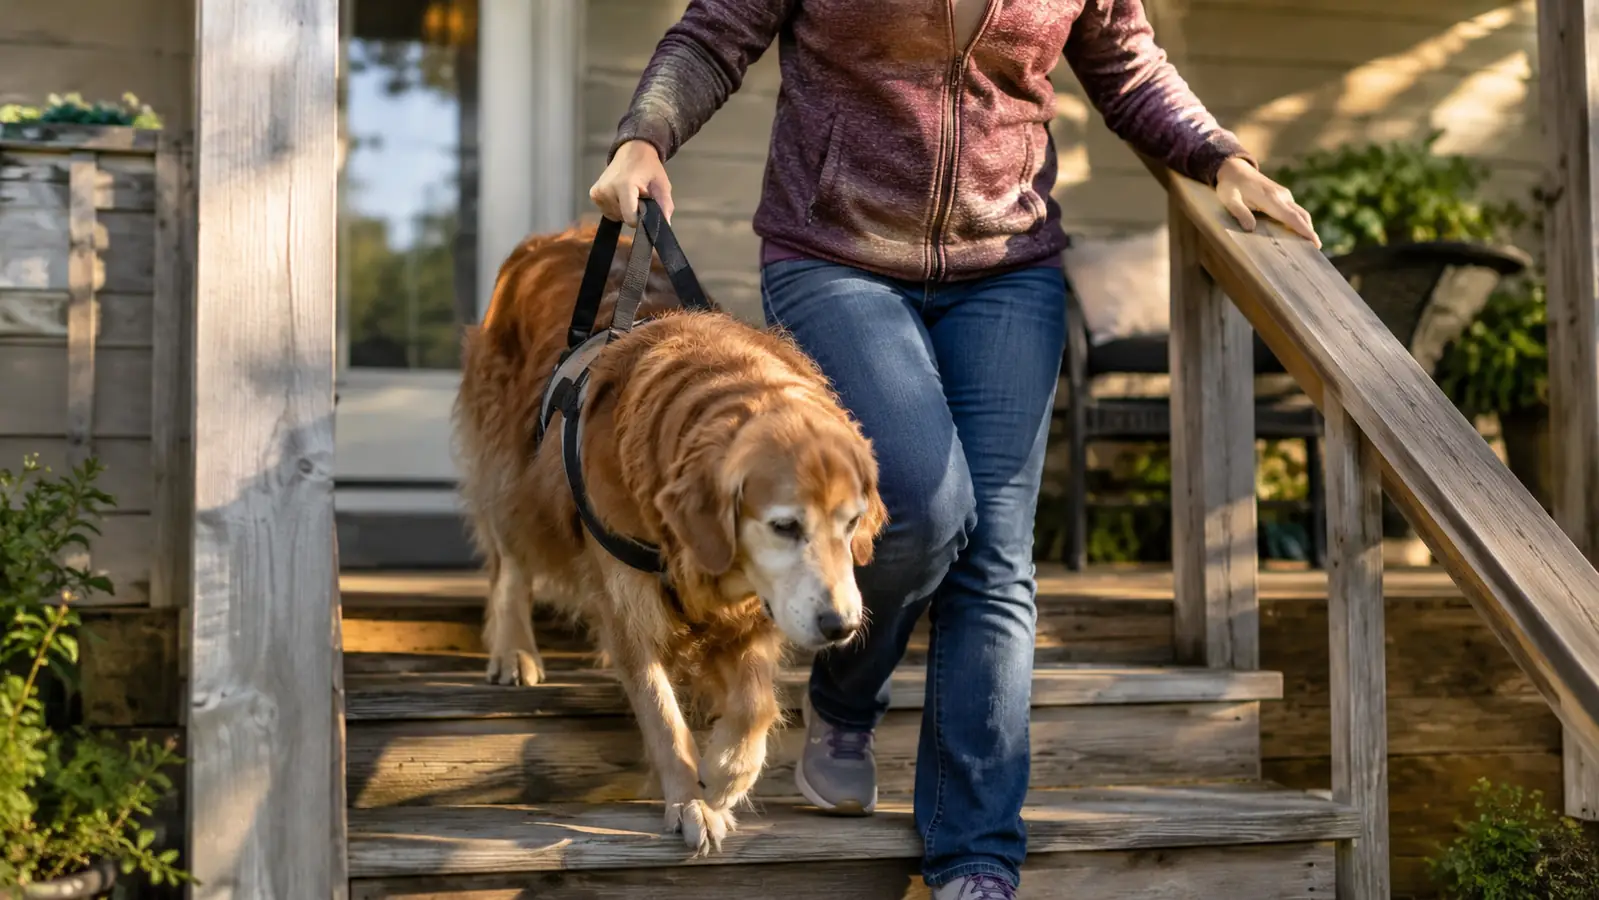
Now I stand beside her on the step, one hand on the sling handle, and I let her set the pace. She puts one front paw up, I take a little weight off her back end, and she brings the back leg up to match. One step at a time. When she reaches the top, I let her stand for a few seconds before we walk inside. That pause lets her catch her breath and reset her balance. On the days when she is stiffer, usually after a long nap or a rainy night, I give her a full minute at the top before we move.
Going down is actually harder for her than going up. She has less control on the way down, and her back legs move faster than she wants them to. I keep the sling handle snug on the way down, almost like a brake, so her back end does not outrun her front end. If your dog struggles more with down, that is normal. Slow down, take one step at a time, and keep the sling snug. I count the steps out loud when she is having a rough day, one, two, three, and I think the rhythm helps her focus.
Step 4: Use the sling for the car, not just the stairs
The stairs were the first thing I used the sling for, but the car was where it really earned its keep. Maple used to jump into the back of my small SUV like she was still two years old. Around age nine, she started hesitating, and by last winter she would just stand at the open door, looking at me like I had asked her to climb a mountain. The first time she could not get in on her own, we were parked at the vet's office, and I had to lift her back end with my bare hands. That was the moment I knew I needed a better system.
The sling works the same way for the car as it does for the stairs. I position it under her belly before I open the car door. She puts her front paws on the seat, I take weight off her back end with the handles, and she walks her back legs up. Coming out of the car, I use the sling as a gentle brake again, so she does not jump down and land hard on her hips. I also fold a thick blanket on the floor of the back seat, so she has a stable surface to push against instead of sliding on the upholstery.
I also use it on walks, but only for the parts where she needs it. On flat ground, Maple walks fine on her own, and I let her. When we hit a curb, a small hill, or a patch of uneven ground, I reach down, take the handles, and give her a little support for a few steps. Then I let go and let her walk on her own again. The sling is a tool, not a leash. She still does the walking. On our two-mile morning route, there is one stretch of cracked sidewalk where she always slows down, and I always have the handles ready before we get there.
Step 5: Build a daily routine, and keep it short and consistent
The thing that helped Maple more than any single step was doing the same thing at the same time every day. We do the sling routine every morning before her first walk, and every evening before she comes in from the yard. Same sling, same position, same calm voice. Dogs are creatures of habit, and Maple is no exception. After about two weeks of the routine, she started walking to the hook by the back door on her own when she saw me pick up her leash.
I keep the LOOBANI sling hanging on a hook by the back door, right next to her leash. That way I never have to go looking for it when she needs it. It takes me about thirty seconds to put it on her, and most mornings she stands there waiting for it now, because she knows what comes next is a walk.
A few notes from experience: do not wait until your dog is already struggling to get the sling. Do not use it to drag your dog anywhere they do not want to go. And do not expect the sling to fix the underlying problem. It does not. It just makes the hard parts of the day easier, which gives your dog more good days. That is worth a lot. I would also say, keep a log for the first couple of weeks. I wrote down the date, the time, and how Maple did on the steps each morning, and it helped me see that she was improving even on the days it did not feel like it.
What Else Helps
The sling is the tool I reach for most, but it is not the only thing that helped Maple. I put a rubber-backed bath mat at the bottom of the porch steps so she has better footing on the concrete. I also laid a few cheap runners over the hardwood floors in the kitchen and hallway, because she slides on bare wood when she tries to turn around. The runners cost less than a bag of dog food and they made an immediate difference. I trimmed the bushes along the path from the porch to the yard, too, so she has a wider, straighter line to walk instead of a narrow curve.
I also changed how I walk her. I let her set the pace on our morning walk. Some days she wants to go a full mile. Some days she walks to the corner and turns around. I follow her lead. And I always check with our vet before changing anything about her care. I am not a veterinarian. I am just a woman who has spent a lot of mornings watching an old dog figure out how to keep moving. If your dog is showing new weakness, especially suddenly, please call your vet first. That is the one piece of advice I would give before any of this.
The sling does not fix the problem. It makes the hard parts of the day easier, and that gives your dog more good days.
Give your senior dog more good days
The LOOBANI rear support sling is the same one I keep by my back door for Maple. Sized for large dogs, with padded handles that make it easy on your back too.
Amazon Check Today's Price on Amazon →